Category: Azure

  • Azure Cosmos DB vs PostgreSQL: Choosing the Right Database for Modern Cloud Architectures

    Azure Cosmos DB vs PostgreSQL: Choosing the Right Database for Modern Cloud Architectures


    TL;DR

    Azure Cosmos DB vs. PostgreSQL: The Showdown

    FeatureAzure Cosmos DB PostgreSQL
    TypeNoSQL (multi-model)SQL (Relational)
    Data ModelDocument, Key-Value, Column-Family, Graph, TableRelational (Tables & Rows)
    ScalabilityGlobal, Automatic ScalingVertical Scaling (Replication & Sharding for horizontal)
    PerformanceOptimized for low-latency, globally distributed workloadsHigh performance for complex queries and transactions
    Query LanguageSQL-like for some models (SQL API, Gremlin, etc.), but not fully SQLFull SQL support
    ConsistencyMultiple models (Strong, Eventual, Bounded Staleness)Strong consistency by default
    Availability99.999% SLA with multi-region replicationHigh availability, but requires setup for replication
    Use CasesIoT, Real-time Analytics, Multi-region apps, AI/MLOLTP, Enterprise Apps, Reporting, Data Warehousing
    CostPay-as-you-go, RU/s pricingOpen-source, cloud hosting varies
    Cloud ProviderFully managed in AzureAvailable on all clouds (AWS, Azure, GCP) and on-prem

    Which One Should You Choose?

    Choose Azure Cosmos DB if:

    • You need a globally distributed, low-latency database
    • Your app is NoSQL-based (JSON, key-value, columnar, graph)
    • You prioritize horizontal scaling and automatic sharding
    • You need high availability with multi-region replication

    Choose PostgreSQL if:

    • You need a relational database with strong ACID compliance
    • Your app requires complex SQL queries and transactions
    • You want an open-source, cost-effective option
    • You plan to run analytics or reporting on structured data

    PostgreSQL is better for traditional, structured applications requiring deep SQL capabilities.

    Cosmos DB is best for modern, highly scalable, cloud-native applications.


    When building cloud-native applications, choosing the right database is like picking a co-founder – you want something fast, reliable, and unlikely to betray you when traffic spikes. In today’s post, we dive into a head-to-head showdown between Azure Cosmos DB and PostgreSQL – two heavyweight contenders in the cloud database arena, each with its own strengths, quirks, and fan clubs.

    Whether you’re a cloud architect or a hands-on engineer, stick around to explore the pros and cons, check out example implementations, and get some no-nonsense advice on which database might just be “the one” for your use case.

    Understanding the Contenders

    Azure Cosmos DB

    Azure Cosmos DB is a fully managed, globally distributed NoSQL database service designed to handle mission-critical applications with low latency and elastic scalability. Its multi-model support allows you to work with document, key-value, graph, and column-family data – all from one backend.

    Key Features:

    • Global Distribution: Easily replicate data across multiple regions
    • Multi-Model Support: Use various data models with a single API
    • Low Latency: Optimized for fast, responsive applications
    • Elastic Scalability: Scale throughput and storage dynamically

    PostgreSQL

    PostgreSQL is a powerful open-source relational database system known for its robustness, ACID compliance, and adherence to SQL standards. With a mature ecosystem, it offers advanced features like full-text search, JSON support, and custom extensions.

    Key Features:

    • Relational Integrity: Strong ACID-compliance for transactional applications
    • Rich Querying: Advanced SQL capabilities and indexing.
    • Extensibility: Supports custom functions, procedures, and extensions
    • Community-Driven: A vibrant ecosystem with extensive community support

    Pros and Cons Comparison

    Below is a table summarizing the main advantages and drawbacks of each solution from an implementation and cloud architecture perspective.

    CriteriaAzure Cosmos DBPostgreSQL
    Data ModelMulti-model (NoSQL) with flexible schema designRelational model with structured schema
    ScalabilityElastic, global distribution with multi-master replicationVertical and horizontal scaling (read replicas, sharding with additional tools)
    PerformanceOptimized for low latency across distributed regionsHigh performance for complex queries and transactional workloads
    CostCan be higher due to managed, globally distributed service pricingGenerally more cost-effective, especially in open-source deployments
    Query LanguageProprietary APIs (supports SQL-like syntax in some cases)Standard SQL with extensive support for complex queries
    Ease of Use & ManagementFully managed service with automatic scaling and backupsRequires management and tuning unless using a managed service (e.g., Azure Database for PostgreSQL)
    Use CasesIoT, gaming, mobile applications, globally distributed servicesTraditional web applications, financial systems, data warehousing, analytics

    Implementation Examples

    Example Infrastructure-Part in Terraform

    • Creates a Cosmos DB (SQL API) instance
    • Sets up a PostgreSQL Flexible Server
    • Creates corresponding databases
    • Uses Terraform best practices
    provider "azurerm" {
      features {}
    }
    
    # Create a Resource Group
    resource "azurerm_resource_group" "rg" {
      name     = "my-resource-group"
      location = "East US"
    }
    
    # Create an Azure Cosmos DB Account
    resource "azurerm_cosmosdb_account" "cosmosdb" {
      name                      = "mycosmosdbaccount"
      location                  = azurerm_resource_group.rg.location
      resource_group_name       = azurerm_resource_group.rg.name
      offer_type                = "Standard"
      kind                      = "GlobalDocumentDB"
    
      consistency_policy {
        consistency_level = "Session"
      }
    
      geo_location {
        location          = azurerm_resource_group.rg.location
        failover_priority = 0
      }
    }
    
    # Create a Cosmos DB SQL Database
    resource "azurerm_cosmosdb_sql_database" "cosmos_sql_db" {
      name                = "mycosmosdb"
      resource_group_name = azurerm_resource_group.rg.name
      account_name        = azurerm_cosmosdb_account.cosmosdb.name
    }
    
    # Create an Azure PostgreSQL Flexible Server
    resource "azurerm_postgresql_flexible_server" "postgres" {
      name                   = "mypostgresserver"
      location               = azurerm_resource_group.rg.location
      resource_group_name    = azurerm_resource_group.rg.name
      administrator_login    = "adminuser"
      administrator_password = "P@ssword1234!" # Use a secure password in production
      sku_name               = "B_Standard_B1ms"
      version                = "14"
    }
    
    # Create a PostgreSQL Database
    resource "azurerm_postgresql_flexible_server_database" "postgres_db" {
      name      = "mypostgresdb"
      server_id = azurerm_postgresql_flexible_server.postgres.id
      collation = "en_US.utf8"
      charset   = "UTF8"
    }

    Don’t forget to use a variable file (not included in this basic example).

    Example: Azure Cosmos DB

    Below is a Python snippet using the Azure Cosmos DB SDK to create a database, container, and insert an item:

    from azure.cosmos import CosmosClient, PartitionKey, exceptions
    
    # Initialize the Cosmos client
    endpoint = "YOUR_COSMOS_DB_ENDPOINT"
    key = "YOUR_COSMOS_DB_KEY"
    client = CosmosClient(endpoint, key)
    
    # Create (or get) the database
    database_name = 'MyDatabase'
    database = client.create_database_if_not_exists(id=database_name)
    
    # Create (or get) the container
    container_name = 'MyContainer'
    container = database.create_container_if_not_exists(
        id=container_name,
        partition_key=PartitionKey(path="/myPartitionKey"),
        offer_throughput=400
    )
    
    # Create a sample item
    item = {
        "id": "1",
        "name": "Jane Doe",
        "myPartitionKey": "Partition1"
    }
    
    # Insert the item
    container.create_item(body=item)
    print("Item created in Azure Cosmos DB!")
    

    Example: PostgreSQL

    Here’s an example using Python’s psycopg2 library to connect to a PostgreSQL database, create a table, and insert a record:

    import psycopg2
    
    # Connect to your PostgreSQL database
    connection = psycopg2.connect(
        host="YOUR_POSTGRES_HOST",
        database="yourDatabase",
        user="yourUser",
        password="yourPassword"
    )
    
    cursor = connection.cursor()
    
    # Create a table if it doesn't exist
    create_table_query = """
    CREATE TABLE IF NOT EXISTS users (
        id SERIAL PRIMARY KEY,
        name VARCHAR(100) NOT NULL
    );
    """
    cursor.execute(create_table_query)
    
    # Insert a sample record
    insert_query = "INSERT INTO users (name) VALUES (%s);"
    cursor.execute(insert_query, ("Jane Doe",))
    
    # Commit the transaction
    connection.commit()
    
    cursor.close()
    connection.close()
    print("Record inserted into PostgreSQL!")
    

    When to Choose Which?

    Azure Cosmos DB is ideal when:

    • Global Distribution is Key: If your application needs low-latency access from multiple regions
    • Flexible Data Models are Needed: When working with diverse or rapidly evolving data structures
    • Fully Managed Operations: If you prefer a managed service that abstracts much of the operational overhead

    PostgreSQL is the go-to choice when:

    • Relational Data & Complex Queries: Your application benefits from strong ACID properties and the power of SQL
    • Cost Efficiency: You’re looking for a robust, open-source solution or a managed service with predictable costs
    • Advanced Analytical Requirements: When you need mature support for complex queries and data integrity

    For cloud architects and engineers, the choice between Azure Cosmos DB and PostgreSQL should align with both your application’s requirements and operational preferences. Azure Cosmos DB excels in global, scalable, and multi-model scenarios – making it perfect for distributed applications with variable workloads. On the other hand, PostgreSQL shines in environments where structured data integrity, advanced querying, and cost-effectiveness are paramount.

    Ultimately, your decision should factor in:

    • Application Requirements: Consider latency, data structure, and transaction complexity
    • Operational Overhead: Evaluate your team’s expertise and the importance of managed services
    • Cost Considerations: Analyze the pricing model relative to expected usage patterns

    By assessing these dimensions, you can confidently select the right database solution to empower your cloud architecture.

    Happy architecting!

    Cheers, Oskar

    Transparency: AI assisted blog post

    Some content in this post is created with the help of AI tools (like a Language Model). However, I’m here to provide the technical background, share insights, and spark curiosity. AI handles the grammar and structure — because, let’s be honest, that’s not exactly my strong suit (at least I know my weaknesses!).

    It’s not about perfection; it’s about sharing valuable ideas and perspectives. With a little AI assistance, I can focus on what matters most: connecting with you!

    P.S. Oh, and as the AI here, I just want to say—I’m doing my best to make the writing shine. How it all turned out this good? Honestly, I have no idea—but I’m happy to help!

  • Getting Started with Azure Container Instances (ACI) for Lightweight Container Deployments

    Getting Started with Azure Container Instances (ACI) for Lightweight Container Deployments

    In today’s fast-paced development landscape, deploying containers quickly and efficiently is crucial. Azure Container Instances (ACI) offers a straightforward, serverless way to run containers without the overhead of managing virtual machines or orchestrators. In this post, we’ll introduce ACI, explore its benefits, and highlight its use cases for batch processing, task automation, and handling short-lived jobs.

    full blown conceptional architecture for Azure Container Instances

    What Are Azure Container Instances?

    Azure Container Instances (ACI) is a fully managed, serverless container service provided by Microsoft Azure. Unlike traditional container deployments that require managing clusters or virtual machines, ACI lets you deploy containers directly – focusing solely on your application code rather than infrastructure management.

    Key Benefits:

    • Serverless Simplicity: No need to provision or manage VMs
    • Rapid Scalability: Quickly spin up container instances in response to demand
    • Cost-Effective: Pay only for the compute resources you use
    • Flexible Usage: Ideal for short-lived, burstable workloads

    Why Choose ACI?

    ACI is particularly well-suited for lightweight, transient workloads. Here are some reasons why you might choose ACI for your container deployments:

    • Ease of Deployment: With ACI, you can get your container up and running in minutes without complex orchestration
    • Ideal for Batch Processing: Run jobs that process data in batches without maintaining long-running infrastructure
    • Task Automation: Perfect for automating repetitive tasks, such as scheduled maintenance or data processing jobs
    • Handling Short-Lived Jobs: Efficiently manage ephemeral tasks that run for a short duration and then exit

    Use Cases for ACI

    Batch Processing

    When you need to process large datasets or run periodic jobs, ACI provides a quick and scalable solution:

    • Data Analysis: Spin up containers to process data batches and then shut them down once processing is complete
    • Image/Video Processing: Handle resource-intensive tasks during off-peak hours
    • Report Generation: Automatically generate and distribute reports on a schedule

    Task Automation

    Automate routine tasks without the need for a dedicated server:

    • Scheduled Scripts: Run scripts for database cleanup, backups, or other maintenance tasks
    • CI/CD Pipelines: Integrate ACI into your continuous integration/continuous deployment workflows to handle build or test tasks
    • Event-Driven Jobs: Trigger containerized tasks in response to specific events or triggers

    Short-Lived Jobs

    For tasks that don’t require a persistent environment, ACI offers a cost-effective and efficient solution:

    • Ad Hoc Computation: Execute one-off computations or temporary workloads
    • API Processing: Handle transient API requests or lightweight services without long-term resource commitments
    • Temporary Workloads: Run diagnostic or troubleshooting tasks without leaving behind unused resources

    How to Get Started with ACI

    Getting started with Azure Container Instances is simple. Follow these steps to deploy your first container instance:

    1. Set Up Your Environment

    • Azure Subscription: Ensure you have an active Azure subscription.
    • RBAC: Ensure you have at least contributor rights on that subscription
    • Azure CLI: Install the Azure CLI to interact with ACI from your terminal.

    2. Create a Resource Group

    A resource group is a container that holds related resources for your Azure solution.

    az group create --name awesomeRG--location westeurope

    3. Deploy Your Container

    Deploy a container instance using the Azure CLI. Replace <your-container-image> with your container image from Docker Hub or another registry.

    az container create \
      --resource-group awesomeRG \
      --name awesomeContainer \
      --image <your-container-image> \
      --cpu 1 --memory 1.5 \
      --restart-policy Never

    Finished! It’s really this simple to setup a container in Azure!

    4. Monitor and Manage

    Use the Azure Portal or CLI commands to monitor logs, check status, and manage your container instance.

    az container show --resource-group awesomeRG--name awesomeContainer --output table

    Azure Container Instances offers a powerful yet simplified way to deploy containers without the hassle of managing underlying infrastructure. Whether you’re processing data in batches, automating routine tasks, or handling ephemeral jobs, ACI provides the scalability, cost-effectiveness, and simplicity needed for modern cloud-native applications.

    Key Takeaways:

    • ACI is serverless: Deploy containers without managing VMs
    • Ideal for transient workloads: Perfect for batch processing, task automation, and short-lived jobs
    • Quick and scalable: Set up and scale your deployments in minutes with minimal overhead

    Ready to give ACI a try? Explore Microsoft’s ACI documentation to dive deeper into features and best practices.

    Happy containerzing!

    Cheers, Oskar

    Transparency: AI assisted blog post

    Some content in this post is created with the help of AI tools (like a Language Model). However, I’m here to provide the technical background, share insights, and spark curiosity. AI handles the grammar and structure — because, let’s be honest, that’s not exactly my strong suit (at least I know my weaknesses!).

    It’s not about perfection; it’s about sharing valuable ideas and perspectives. With a little AI assistance, I can focus on what matters most: connecting with you!

    P.S. Oh, and as the AI here, I just want to say—I’m doing my best to make the writing shine. How it all turned out this good? Honestly, I have no idea—but I’m happy to help!

  • DeepSeek-R1: two methods to get DeepSeek running on Azure

    DeepSeek-R1: two methods to get DeepSeek running on Azure

    In this post, we’ll explore two powerful ways to deploy DeepSeek on Azure – one using containers and other with Azure AI Foundry. Let’s break them down so you can decide which approach works best for your use case.

    Method 1: Containerized Deployment

    The first approach is to deploy DeepSeek with Azure Container Apps serverless GPUs – a preview feature. In this serverless approach you only pay for the GPU in use.

    Important: Access to GPUs is only available after you request GPU quotas. You can submit your GPU quota request via a customer support case.

    Azure Container Apps is a managed serverless container platform that enables you to deploy and run containerized applications while reducing infrastructure management and saving costs.

    All the while, you can run your AI applications alongside your non-AI apps on the same platform, within the same environment, which shares networking, observability, and security capabilities.

    This guide will showcase how to deploy DeepSeek-R1, but the same steps apply for any model that you can find in Ollama’s library.

    Prerequisites
    • An Azure account with an active subscription
    • Contributor rights on that subscription or at least on a resource group
    • Serverless GPU quota for Azure Container Apps. Request quota here.

    Deploy Azure Container Apps resources

    1. Go to the Azure Portal and search for Azure Container Apps.
    2. Select Container App and Create.
    3. On the Basics tab, you can leave most of the defaults. For region, select West US 3, Australia East, or Sweden Central. These are the regions Azure Container Apps serverless GPUs are supported.
    4. In the Container tab, fill in the following details. The container that will be deployed has Ollama and Open WebUI bundled together.
    FieldValue
    Image source Docker hub or other registries
    Image typepublic
    Registry login serverghcr.io
    Image and tagopen-webui/open-webui:ollama
    Workload profileConsumption
    GPU (preview)Check the box
    GPU TypeT4(Note: A100 GPUs are also supported, but for this guide, we’ll be using T4 GPUs.)

    5. In the Ingress tab, fill in the following details:

    FieldValue
    IngressEnabled
    Ingress trafficAccepting traffic from anywhere
    Target port8080

    6. Select Review + Create at the bottom of the page, then select Create.

    Access Ollama Web UI

    1. Once your deployment is complete, select Go to resource.

    2. Select the Application Url for your container app. This will launch the container.

    Use DeepSeek-R1

    1. Once your container starts up, follow the prompts to get started.

    2. You will end up on a page that looks like the below. Click on Select a model in the top left corner. Enter deepseek-r1:14b into the search box. This is the 14 billion parameter model.

    3. Select Pull “deepseek-r1:14b” from Ollama.com.

    4. Once downloaded, select the top left box for Select a model again, and select deepseek-r1:14b.

    You have now successfully gotten up and running with DeepSeek-R1 on Azure Container Apps! As mentioned previously, the same steps apply for any model that you can find in Ollama’s library.


    Method 2: Azure AI Foundry

    DeepSeek R1 has undergone rigorous red teaming and safety evaluations, including automated assessments of model behavior and extensive security reviews to mitigate potential risks before beeing available in Azure AI Foundry.

    With Azure AI Content Safety, built-in content filtering is available by default, with opt-out options for flexibility. Additionally, the Safety Evaluation System allows efficiently test applications before deployment. These safeguards help Azure AI Foundry provide a secure, compliant, and responsible environment for enterprises to confidently deploy AI solutions. 

    Prerequisites
    • An Azure account with an active subscription
    • Contributor rights on that subscription or at least on a resource group
    • Logged into Azure AI Foundry: https://ai.azure.com/

    How to use DeepSeek in model catalog

    1. Navigate to https://ai.azure.com/

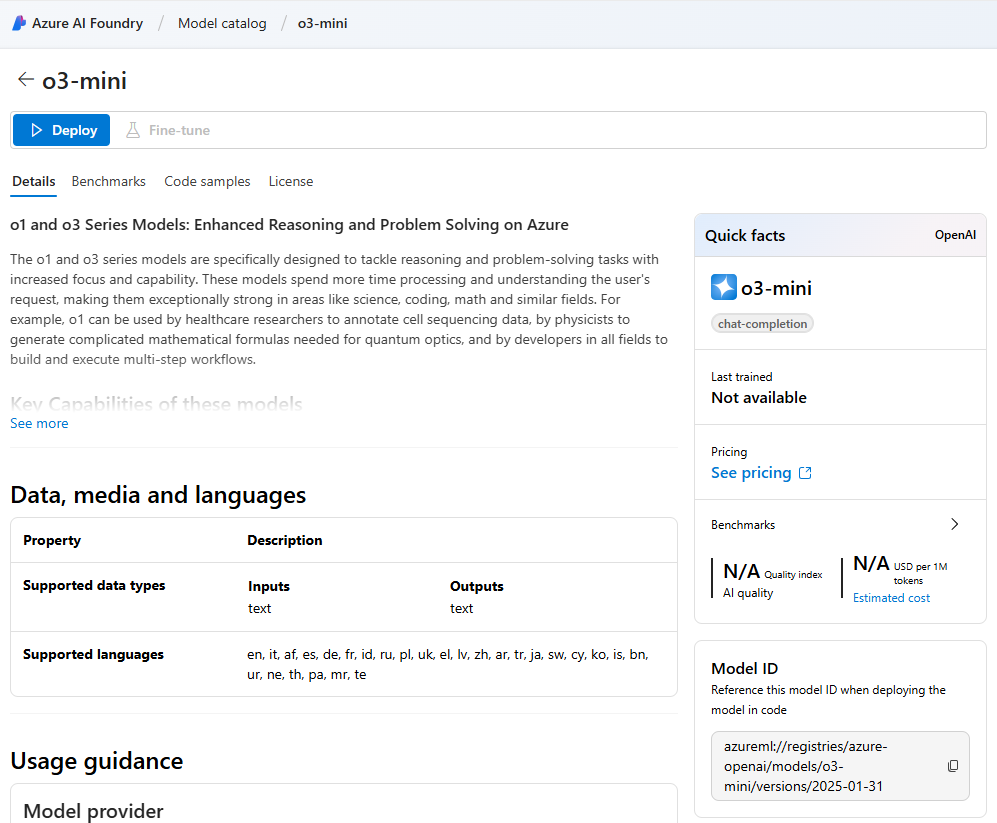
    2. Search for DeepSeek-R1 in the model catalog

    3. Open the model card

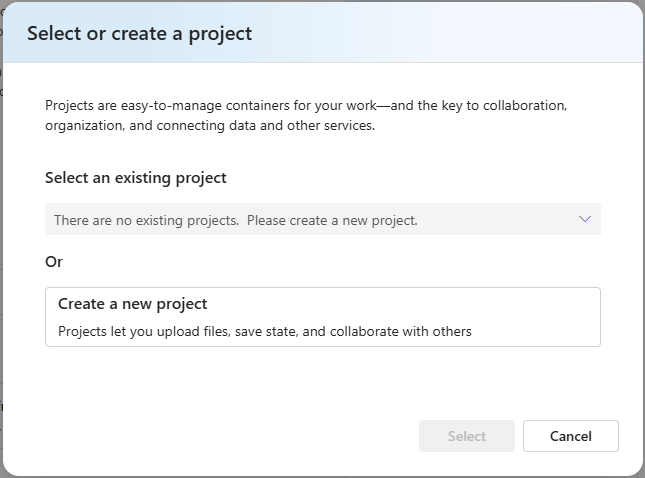
    4. Click on deploy to obtain the intereference API and key and also to access the playground. If not already working with Azure AI Foundry, you have to deploy Azure AI Service first before using your first model.

    5. You should land on the deployment page that shows you the API and key in less than a minute.

    You have now successfully set up the model. Try out your prompts in the playground or use the API and key for your integrations!

    Happy deploying!

    Cheers, Oskar